

ISO seems to be quite the topic lately across brands. If geeky 100% noise magnification bores you, skip this article. The real application of use is certainly limited. I have my reason for saying that and will give a small opinion at the end. However, for those that have been interested in this and want to see some examples of the E-M1mkII…keep on reading!
I certainly am not the ultra geeky tech spec kind of photographer. I enjoy gaining an understanding of how things work, and can appreciate unique engineering and techie application…but it doesn’t consume or define my process. At the end of the day I do whatever works to get the result I want. Nobody I am making a picture for cares about any of this stuff. Nor will any of this stuff change the perception of my images. That being said… I do enjoy astrophotography. It’s fun. I love nightscapes too… you know the landscape images everyone is doing with the milky way. That’s fun. Although, they are infinitely easier to make than the crazy astro images people are producing through telescopes. My interest comes from that area.
I am not going to go deeply into ISO invariance here. If you want a thorough explanation, just google it or look on youtube. You will find endless information. Basically though it is the ability to boost gain in the image and still have an equivalent photo compared to having boosted the gain in camera. The super simplified reason for this is to better retain highlights and tonal range by shooting at a lower ISO and then increasing exposure in post processing versus shooting at a high ISO with a proper exposure. Generally sensors lose fidelity in their higher ISOs. ISO is basically just the sensor “turning up the volume.” Again, simplified. I won’t even bother discussing heat, different stages where noise is introduced, etc… So if you do the post process boosting and all the images look the same, you can consider your sensor invariant and ta-da! you can shoot at “whatever ISO you feel like you can always pull the detail later. Or at least that is what a lot of people are running around comparing lately. I’ll reserve my opinions.
So let’s take a look at this. Feel free to click on the images to see them large.
In this image ISO 200 is boosted +5 in lightroom, ISO 400 +4, etc… up to ISO 6400 which has no boosting. Basically to match exposures. Very interesting that ISO200 falls apart while ISO 400 looks good. ISO 800 isn’t so hot…but ISO 1600 and 3200 are not bad. In camera Noise Reduction for long exposure is on.

Same concept as the previous image. In this one I have in noise reduction off, but I also did a shorter exposure to eliminate that variable. Interesting result. Again ISO 200 falls apart and shows magenta cast as it did before. The noise among these is all very even and similar.
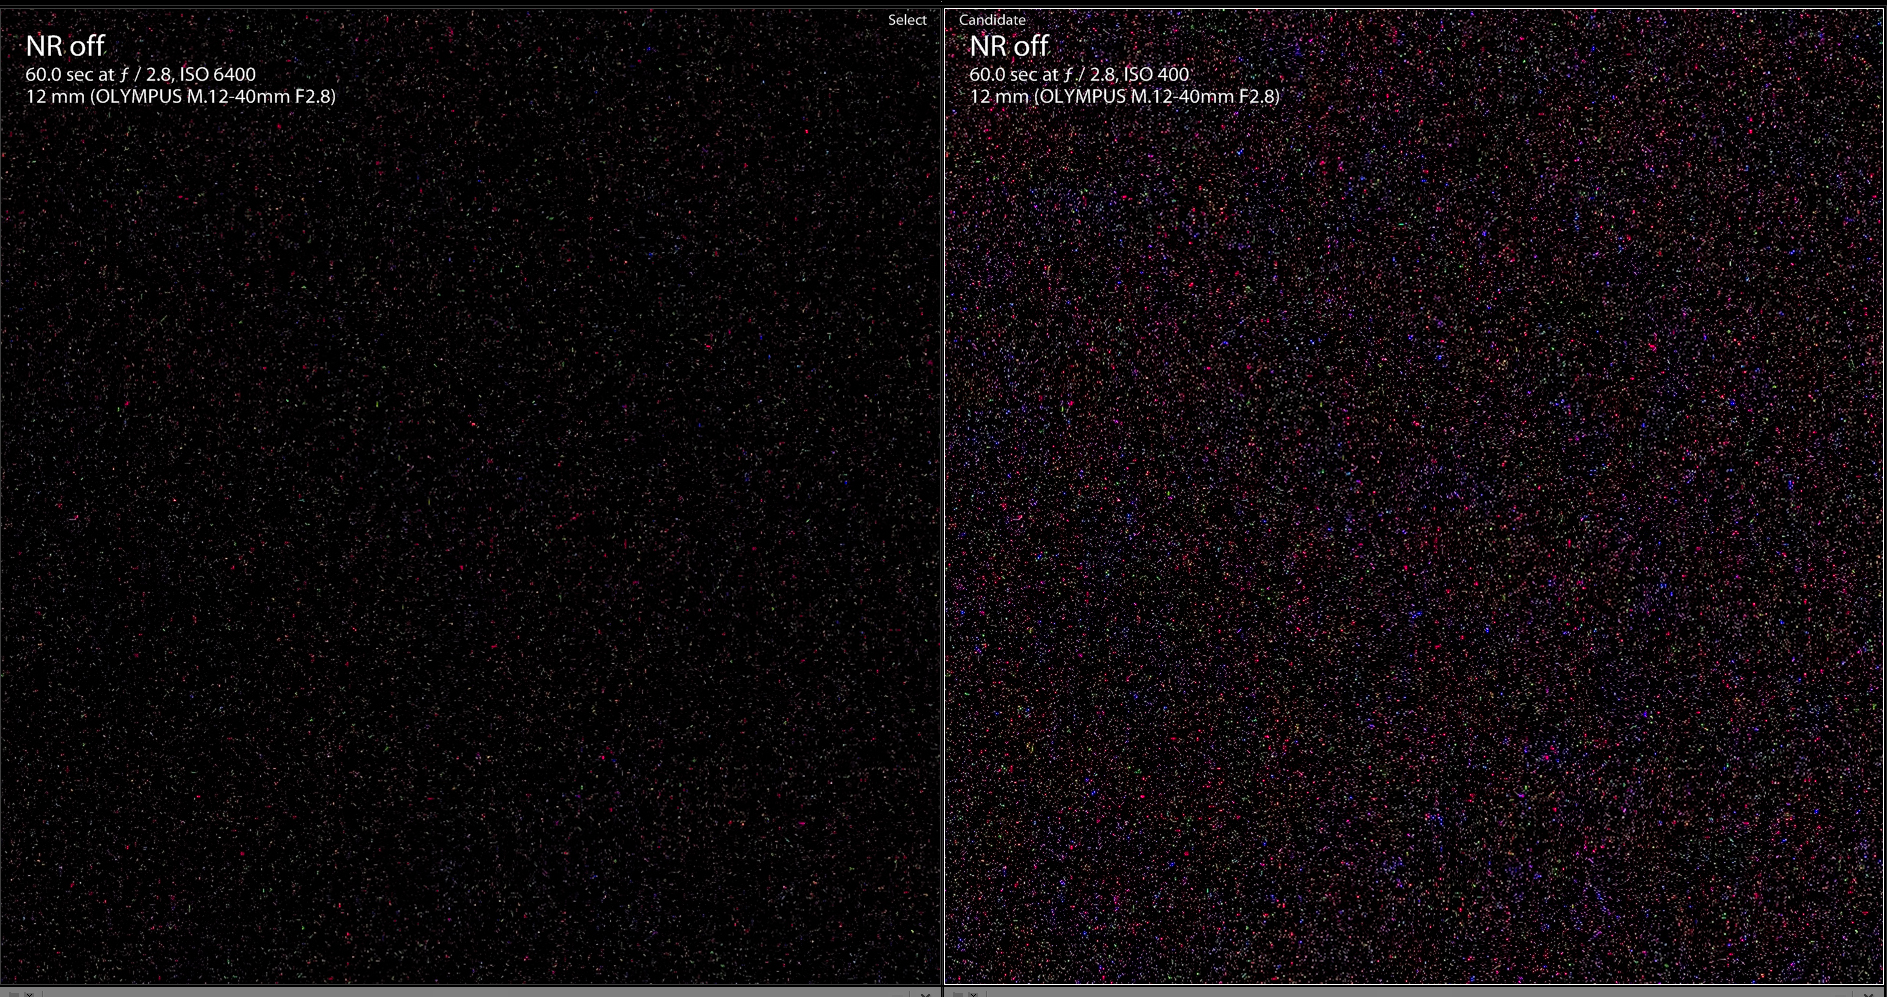
Here is a shot comparing a 60 second image at 6400 with NR turned off with the same image at ISO 400 boosted +4 to match up. I left out all the rest…there was no point. Each shot gets a little cleaner up until 6400 with no boost. Notice the difference. Which would you prefer?

So I wanted to see what the real difference would be for us astrophotographers. The first photo is 1 minute of exposure at 6400. The second image ISO400 at 16 minutes. This is true exposure instead of boosting in lightroom. I left noise reduction on to see a typical use scenario. Yes I know most astrophotographers would take dark frames, flat frames, and bias frames…but many people using a DSLR often just stack shots straight out like this. This is also more typical of a star trails type photo, etc… Take note at how much clean the ISO400 image with 16 minutes worth of exposure (and an equivalent 16 minute dark reduction) is compared to the ISO 6400 shot.

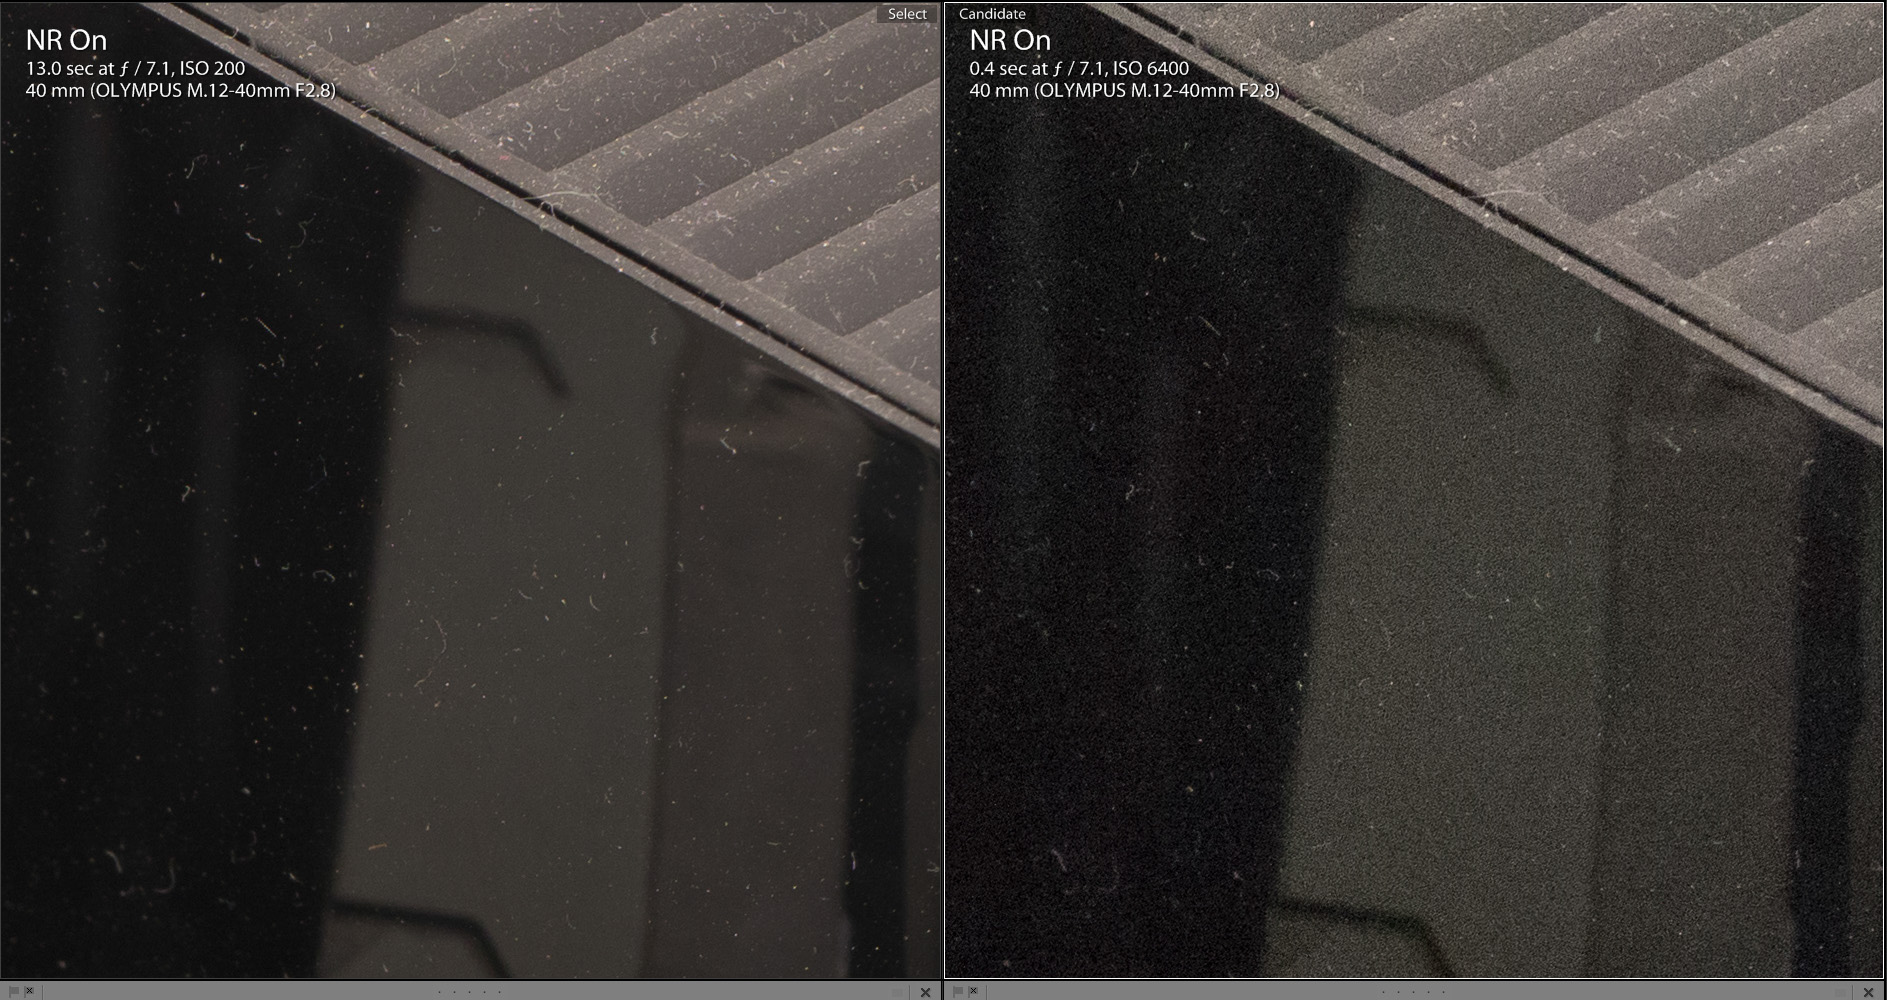
These two crops come from a shot that is a true ISO 200 exposed properly against an ISO 6400 shot. This is the same scene as the first image. The ISO 200 is not boosted…just exposed longer to match. Obviously cleaner with less noise. I just wanted to show this for perspective.
Take what you will from these. At the end of the day, I still believe there is no substitution for proper exposure. I would still prefer to get the shot done as fully as possible in camera and not need to boost everything later. In fact i’de still rather shoot at ISO 3200 or 6400 if I need and see my results are correct that shoot everything and boost later. Just me. In testing this out, I found I still gravitated towards an ISO3200 shot in daylight as opposed to the same image at ISO 400 and boosted 3 stops. The grain might look similar….but they are not identical in detail rendering.Or at least what i’m seeing in further testing. Then again, why in the world would you do this aside from fringe moments where you are left no other option? For astro images, I still prefer as much exposure as I can, at the ISO that provides the best trade off in signal and noise over my long exposure.
The boosted shots still look like ISO6400 at the end of the day. Honestly…ide rather all my shots look like ISO200 if I can get away with it. Just me though…What are you thoughts on this? Do you use this concept in your actual shooting?


 My name is Tony. When I'm not writing for this site, i'm often creating images for clients, recording music, or out in nature. You can always bet I have my E-M1 next to me...
Do you think the E-M1 mark1 performs the same or is the E-M1 mark2 engineered for lower noise?
I honestly haven’t done very strict testing between the two cameras. The E-M1 mkII was so much better collectively with all the changes that I would use it regardless. However, from my shooting time with it, it definitely is cleaner. I find even my presets represent this. On the E-M1 I had different presets for noise at 3200 and 6400 iso. And then a preset for anything above 6400 and above. Basically I a really brightly exposed image with little noise at 6400 could use my 3200 preset. But a dim shot at 6400 needed different processing.
On the E-M1 mkII ISO 3200 and 6400 are treated identically and I get a much better result. And neither need as much.
I find myself noticing noise and adjusting for it much less with the mkII. Long exposure noise is cleaner in general too. Was the sensor better engineered for it…no clue. I’m sure the new processing has a hand in it too though.
While your image samples of the faucet do a great job of showing general noise, the objects are smooth and can’t show differences in detail rendition. It might have been more useful to select a subject with fine detail so the viewer could see how detail was impacted at low vs high iso, in addition to the excellent noise samples you presented. An interesting test, nevertheless.
Good comparisons. Couple of questions. Firstly; Is ‘NR’ on, on the camera, a decent parrallel to what would have been the result with ‘NR’ off, but using Darks, flats etc calibration after? Secondly, if correctly exposed, will there generally be less noise (‘NR’ off), plus more dynamic range at lower iso’s, longer exposures? Have always shot at 1600iso. Would 800iso be a better choice with a longer exposure, but maybe also for same exposure and a minor boost be better (integration, darks etc inc). And also, The camera/sensor remains warm when shooting back to back exposures of whatever length for Astro, So,would it be correct that any ‘thermal noise’ is unnavoidable, so, is kind of, out of the equation? (Em1 Mk2)
Cheers
Paul